
Outlook 2016 can be connected to Gmail email platform.
Enable IMAP
- Launch Gmail
- In the top right, click Settings gear

- Select Settings
- Click on the Forwarding and POP/IMAP tab

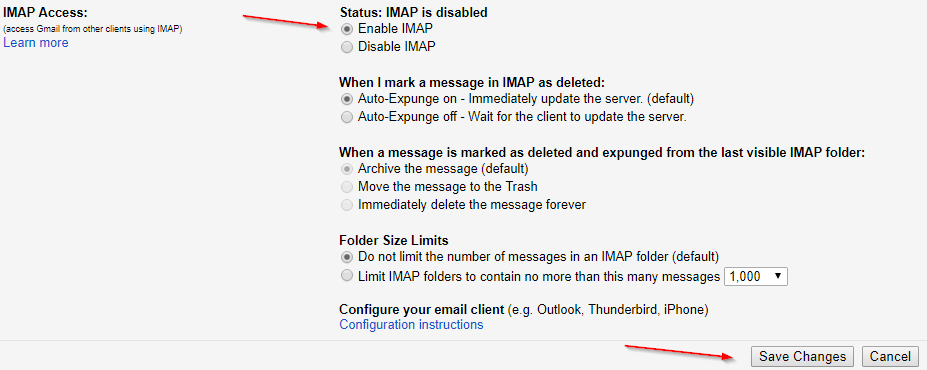
- Click on the Enable IMAP option
- Click on the Save Changes button
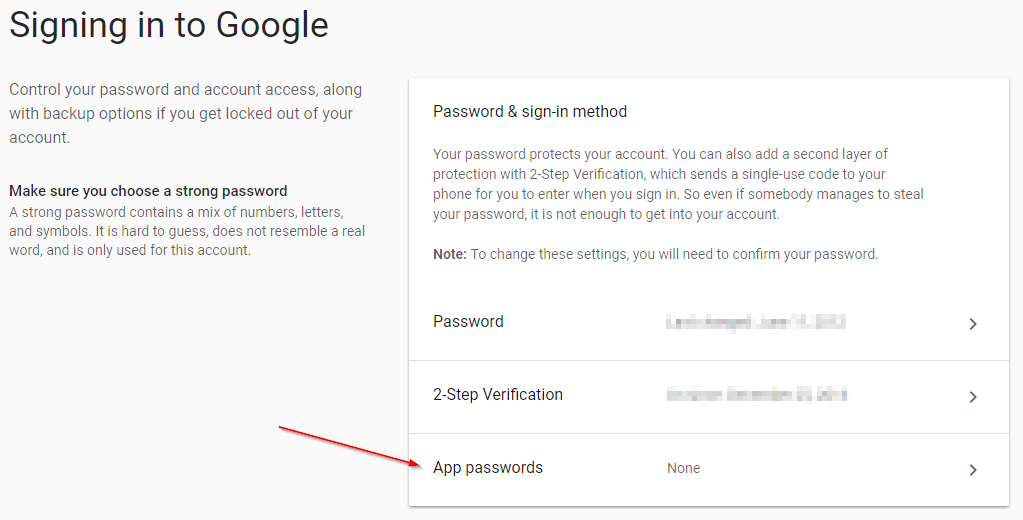
- Launch Google's My Account Security
- In the Signing in to Google heading, in the Password & sign-in method section, click on App passwords field
- Click on Select app field, select Other (Custom name) option
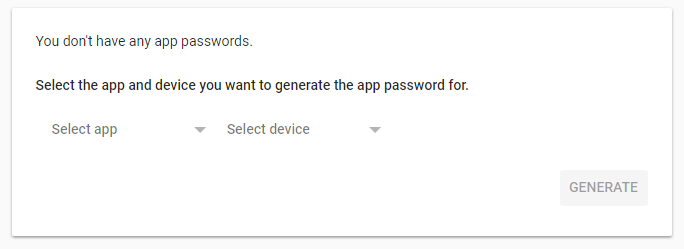
- Type in Outlook 2016, for example
- Click the Generate button
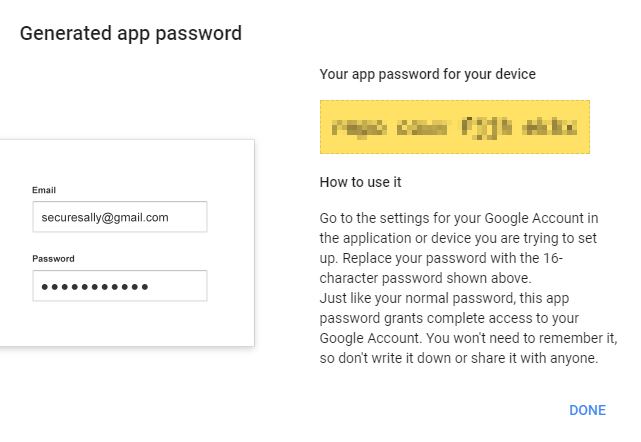
- Copy the the temporary password in the yellow box. You will need it later when configuring Outlook 2016
Configure Outlook
- Launch Outlook 2016
- Click on the File menu
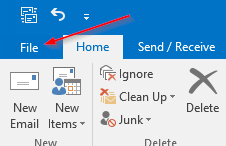
- Click on Account Settings button
- Click on Account Settings... menu option
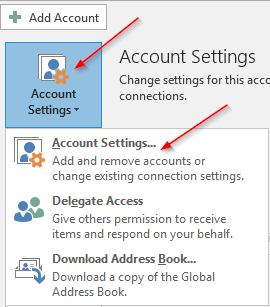
- Click on New.. button
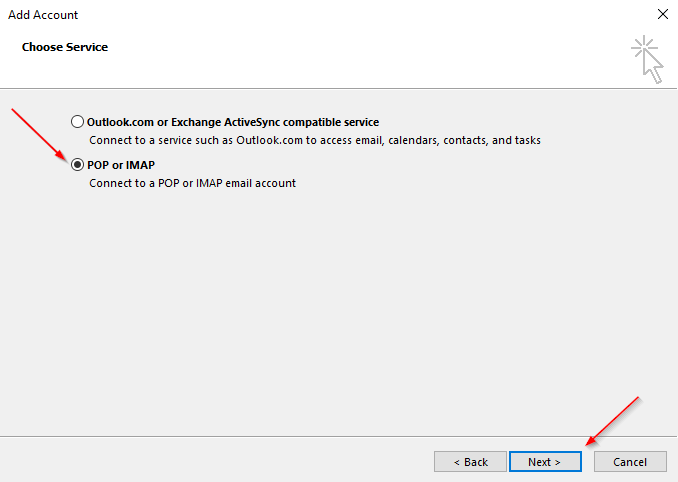
- Select Manual Setup or additional server types option
- Click Next

- Select POP or IMAP option
- Click Next
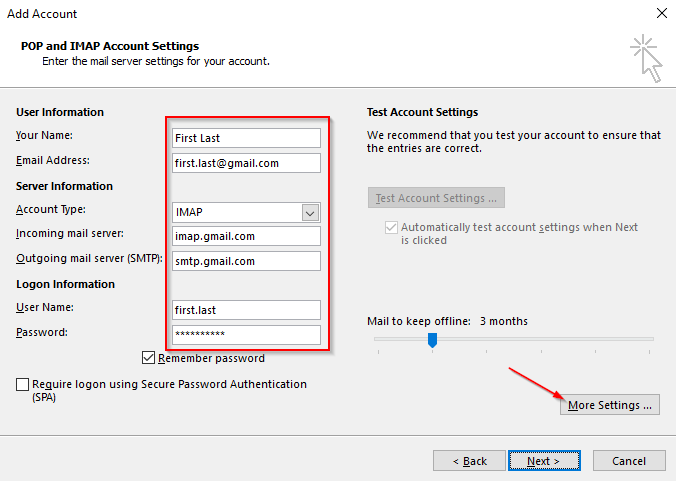
- In the Your Name field, type the name you would like to appear on your email
- In the Email address field, type your gmail email address
- In the Account Type drop down, select IMAP
- In the Incoming mail server field, type imap.gmail.com
- In the Outgoing mail server (SMTP) field, type smtp.gmail.com
- In the User Name field, type the contents of your email address name, without the @gmail.com
- In the Password field, type the password your Generated App Password you received earlier
- Click More Settings ... button
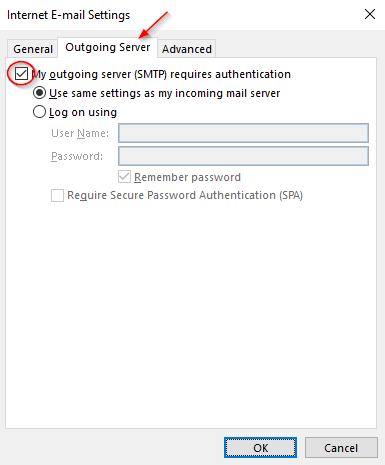
- Click the Outgoing Server tab
- Select the My outgoing server (SMTP) requires authentication
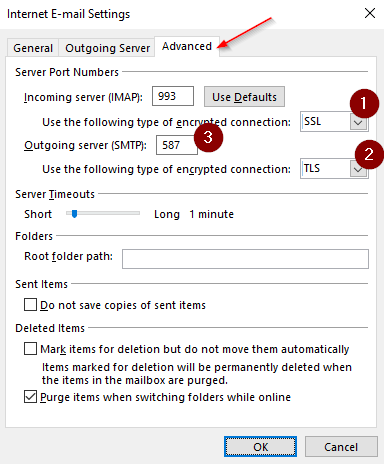
- Click the Advanced Tab
- In the Incoming Server (IMAP), for Use the follow type of encrypted connection, select SSL
- The port will change from 143 to 993
- In the Outgoing Server (SMTP), for Use the follow type of encrypted connection, select TLS
- Change the port for Outgoing Server (SMTP) to 587
- Click OK to close the Internet E-mail Settings
- You will now be back at the Account Settings screen
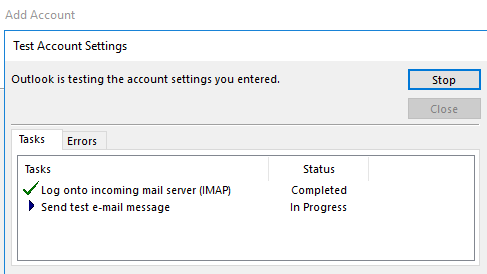
- Click Next to proceed to check the settings
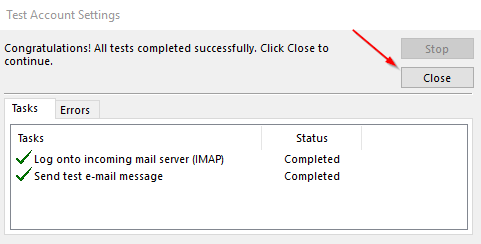
- Click Close when all the tests complete
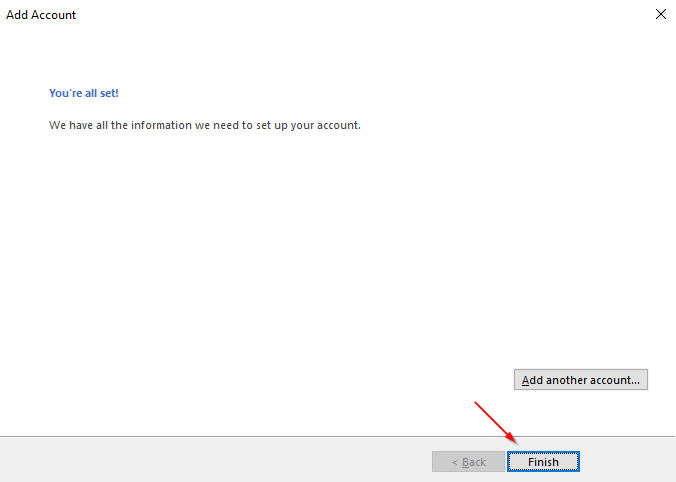
- Click Finish to close the Add Account screen
- Click Close to close the Account Settings screen
Comments
0 comments
Article is closed for comments.